0、Redis
REmote DIctionary Server(Redis) 是一个由Salvatore Sanfilippo写的key-value存储系统。
Redis是一个开源的使用ANSI C语言编写、遵守BSD协议、支持网络、可基于内存亦可持久化的日志型、Key-Value数据库,并提供多种语言的API。
它通常被称为数据结构服务器,因为值(value)可以是 字符串(String), 哈希(Hash), 列表(list), 集合(sets) 和 有序集合(sorted sets)等类型。
Redis 是完全开源 免费的,遵守BSD协议,是一个高性能的key-value数据库 。
Redis 与其他 key - value 缓存产品有以下三个特点:
Redis支持数据的持久化,可以将内存中的数据保存在磁盘中,重启的时候可以再次加载进行使用。
Redis不仅仅支持简单的key-value类型的数据,同时还提供list,set,zset,hash等数据结构的存储。
Redis支持数据的备份,即master-slave模式的数据备份。
Redis的优势:
性能极高 – Redis能读的速度是110000次/s,写的速度是81000次/s 。
丰富的数据类型 – Redis支持二进制案例的 Strings, Lists, Hashes, Sets 及 Ordered Sets 数据类型操作。
原子 – Redis的所有操作都是原子性的,意思就是要么成功执行要么失败完全不执行。单个操作是原子性的。多个操作也支持事务,即原子性,通过MULTI和EXEC指令包起来。
丰富的特性 – Redis还支持 publish/subscribe, 通知, key 过期等等特性。
官网:https://redis.io/
中文官网:http://www.redis.cn/
1、Linux下的Redis的安装 1.1、下载 下载地址:https://redis.io/download
或者
1 wget http://download.redis.io/releases/redis-5.0.3.tar.gz
1.2、上传文件到服务器 如果是直接使用wget下载的就不用再上传
1.3、解压文件 1 tar -zxvf redis-5.0.3.tar.gz
解压后目录
1.4、安装依赖
redis 是基于C++开发的,所有要安装C++的环境
1 yum -y install gcc-c++ autoconf automake
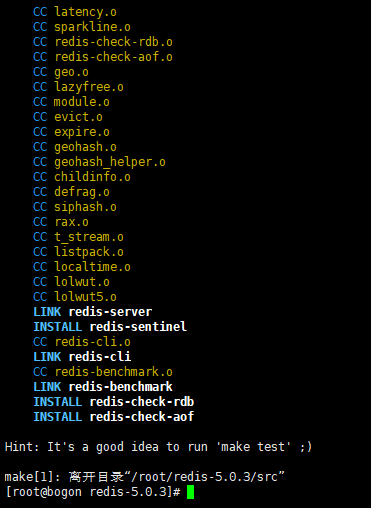
1.5、预编译 1 2 cd redis-5.0.3 # 进入redis目录 make # 预编译
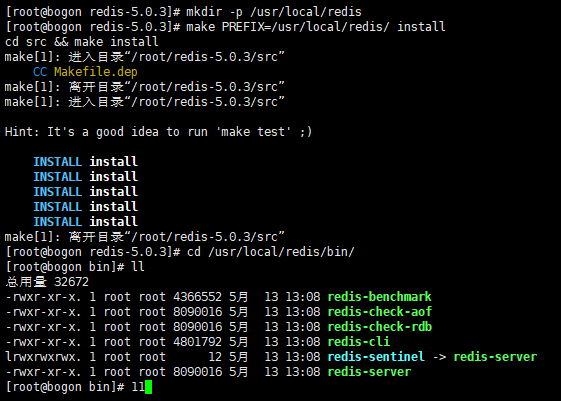
1.6、安装 创建一个安装目录,不然会安装到一个默认路径,后期路径不好找
1 mkdir -p /usr/local/redis
安装到指定路径
1 make PREFIX=/usr/local/redis/ install
Redis-cli :客户端Redis-server :服务器端
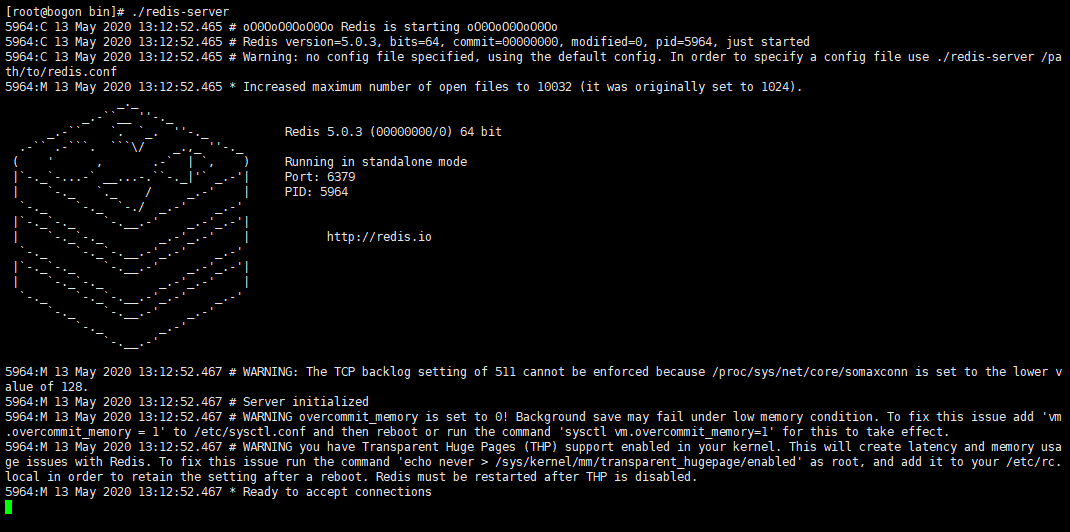
1.7、前台启动
默认就是前台启动,但是前台启动有一个不好的地方,就是Redis会一致占用前台输入,无法进行别的从操作。这是为了方便就需要把Redis设置为后台启动,让它在后台运行,不耽误前台进行别的操作。
1.8、后台启动 1、ctrl+c,结束前台程序运行
2、复制解压的redis目录下的redis.conf文件到安装的路径
1 cp /root/redis-5.0.3/redis.conf /usr/local/redis/bin
3、修改bin目录下的redis.conf文件
修改daemonize on 为 daemonize yes
4、再次运行查看
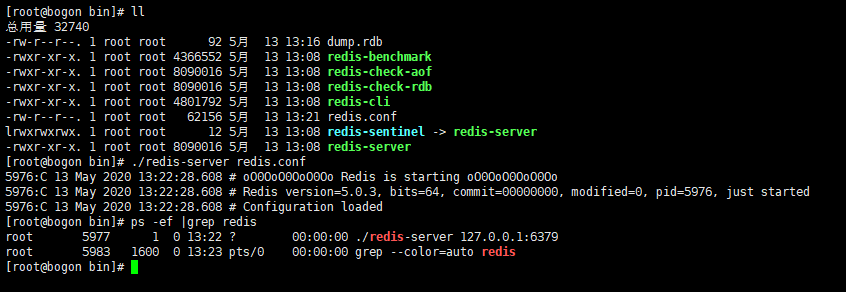
再次启动程序,需要戴胜redis.conf文件,否则还是前台运行
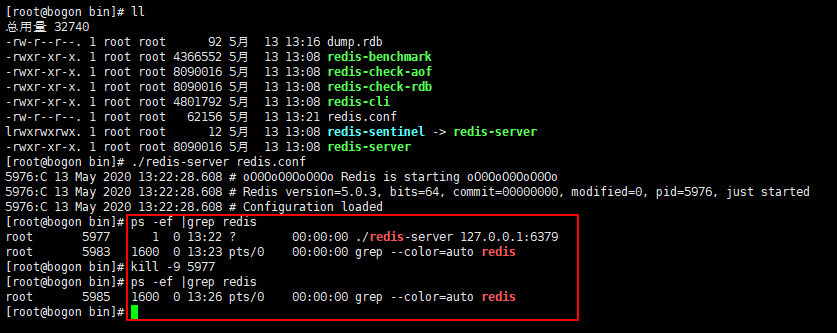
1 2 ./redis-server redis.conf # 启动程序 ps -ef |grep redis # 查看和redis相关的进程
5、后台进程关闭
前台启动的话只需要ctrl+c就可以关闭,但是后台启动相比就麻烦了点,需要直接关闭进程
5977:进程号
2、windows客户端方法Redis 2.1、安装客户端软件 下载地址:https://lanzous.com/ickc0yd
常规安装,选择安装路径,下一步就可以了
2.2、配置服务器端Redis程序
默认情况下,Redis是不允许别的客户端连接访问的,只能是本机(127.0.0.1)访问,需要设置一下,否则windows客户端连接不上redis
1、注释掉bind 127.0.0.1
如果注释掉bind就表示可以是任何ip访问,如果是想要指定的IP访问,直接在127.0.0.1 后添加指定IP就可以
2、关闭保护模式,设置protected-mode为no,否则依然无法连接
3、设置访问认证(密码)
默认状态下是没有开启认证的,需要手动取消#注释(该命令大概在500行左右)
4、保存退出,结束进程,重新启动redis
1 ./redis-server redis.conf
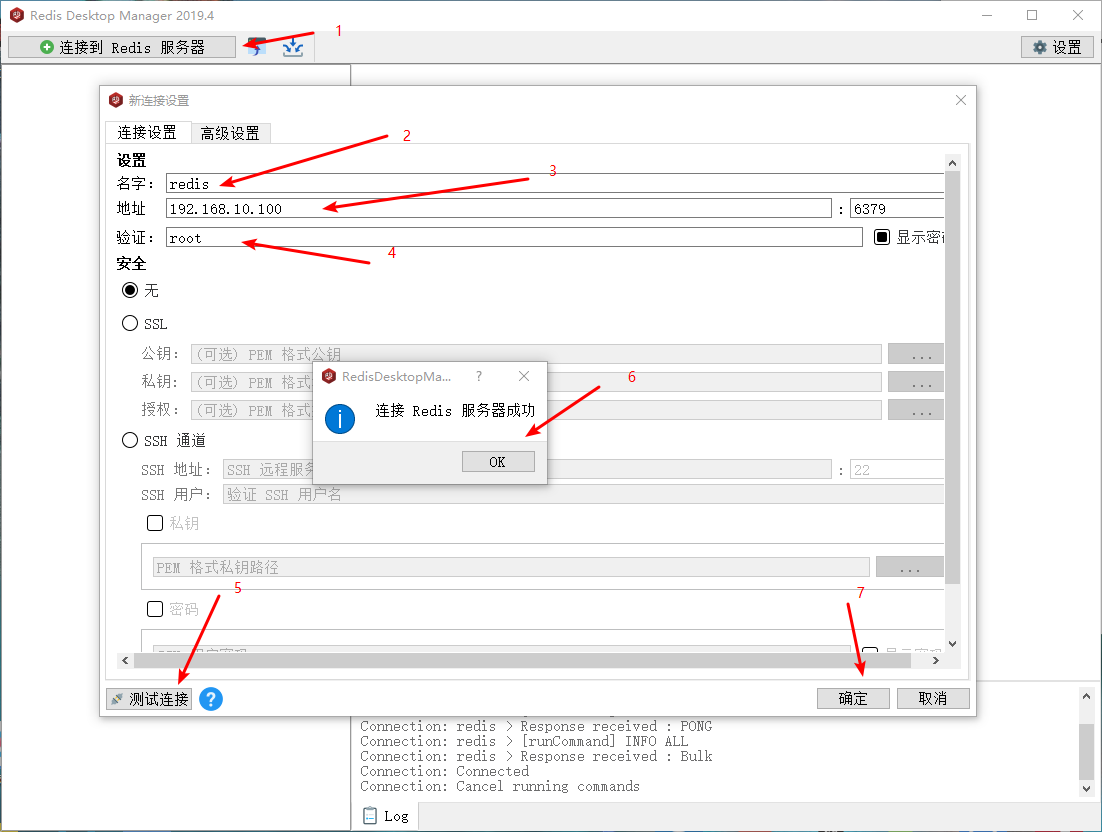
2.3、windows客户端连接redis
3、Redis-cli连接操作Redis
Redis-cli就是Redis自带的一个客户端程序,可以用来操作Redis,在安装的路径里
3.1、redis-clid连接redis 1 ./redis-cli -p 6379 -a root
6379:redis的默认端口
root:认证密码
3.2、操作redis 3.2.1、String类型 1 2 3 4 set name zhangsan # 添加一个名为name的String类型数据,值为zhangsan get name # 获取名为name的String类型数据 mset age 18 addr henan # 批量添加String类型数据 mget age addr # 批量获取String类型数据,获取名为age和addr的数据
3.2.2、Hash类型 1 2 3 4 5 6 hset userInfo name list # 添加一个名为UserInfo的hash类型,其中一个名是name,值为list hget userInfo name # 获取名为name的数据 hmset userInfo age 18 addr henan # 添加多条数据 hmget userInfo age addr # 获取多个数据 hgetall userInfo # 获取全部数据 hdel userInfo addr # 删除指定数据
3.2.3、List类型
这里的List类型比较特殊,分为左右两种,一种是从左边添加,一种是从右边添加。左边添加就类似于一种压栈效果,先进的排到后面,右边添加就是常规的追加。
1 2 lpush students zhangsan lisi # 左边添加 lrange students 0 2 # 遍历list,0起始索引,2结束索引
可以看到zhangsan排在了后面,而lisi排在前面,类似于一个压栈的效果
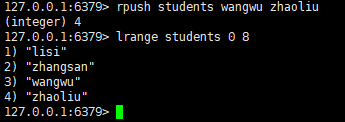
1 2 rpush students wangwu zhaoliu # 右边添加 lrange students 0 8 # 遍历,结束索引可以是一个比list长度大的数字
可以看到,右边添加wangwu在zhaoliu前边,就是一个追加的效果
1 2 llen students #查看长度 lrem students 1 lisi # 删除指定数量的指定元素
lrem students 1 lisi:删除students中的1个lisi
1 2 lpop students # 移除左边开始的第一个元素 rpop students # 移除右边开始的第一个元素
3.2.4、Set类型
这里的set类型和java的一样,无序,不重复
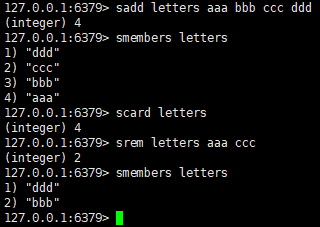
1 2 3 4 sadd letters aaa bbb ccc ddd # 添加set类型数据 smembers letters # 查看set类型数据 scard letters # 获取set类型数据条数 srem letters aaa ccc # 删除set类型里的指定元素
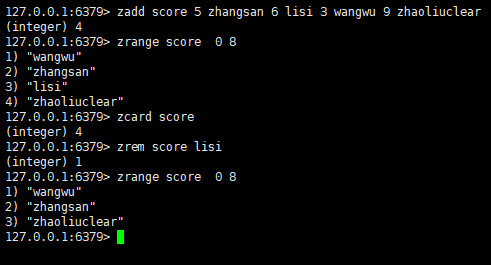
3.2.5、Sorted Set类型
一个有序的Set类型
1 2 3 4 zadd score 5 zhangsan 6 lisi 3 wangwu 9 zhaoliuclear # 添加参数,数值代表等级,数值越低,排名越靠前 zrange score 0 8 # 遍历数据 zcard score # 数据元素条数 zrem score lisi # 删除指定元素
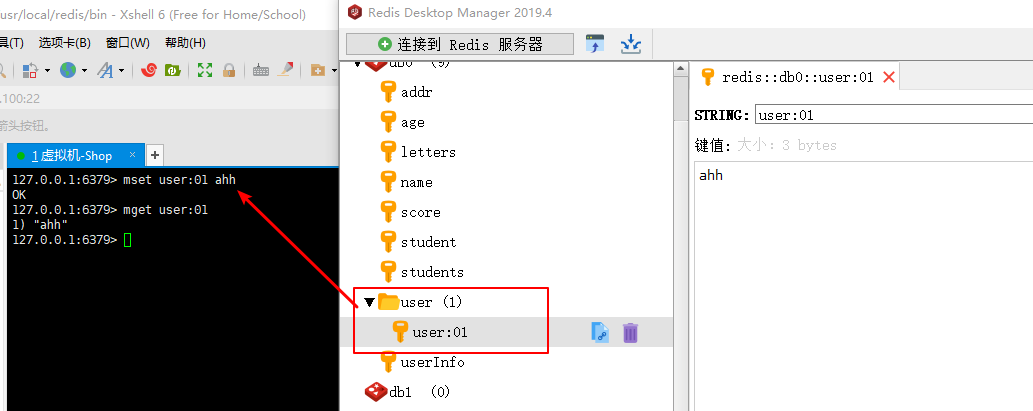
3.2.6、层级关系|目录结构存储数据 1 2 mset user:01 ahh # 以层级关系存储数据,:分割层级 mget user:01 # 以层级关系查找数据,:分割层级
3.2.7、设置Key的失效时间 有几种不同的命令可以设置失效时间
方式一:
1 set code test ex 10 # 10秒后失效
方式二:
1 2 set code test # 添加数据 expire code 10 # 设置10秒后失效
expire:秒
pexpire:毫秒
expireat:秒的时间戳
pexpireat:毫秒的时间戳
方式三:
1 set code test nx ex 10 # code存在时才设置失效时间
code:key
test:value
nx:不存在时设置时间,还有一个可选值xx,存在时设置失效时间
ex:秒[px:毫秒]
3.2.8、删除 1 2 set code test # 添加数据 del code # 删除数据
4、Redis持久化储存
Redis是内存中的数据结构储存系统,不是直接存储在磁盘上的,所有就有可能会在机器宕机的时候无法有效的储存数据,所以就需要持久化储存。
Redis有三种方式可以用于持久化储存数据
4.1、bgsave 使用bgsave手动持久化储存数据
这种方式后进行持久化操作很方便,但是很麻烦,需要重复多个的执行bgsave命令
4.2、save配置 Redis还自带了一种save的持久化储存方式,这是一种自动化的储存方式(默认开启)。可以在redis.conf文件中看到(大概220行左右),这种方式会在指定时间内,进行自动保存
默认配置如图,表示在
900秒内,有一个key被改动,则在900秒后被自动持久化保存
300秒内,有10个key被改动,则在300秒后被自动持久化保存
60秒内,有10000个key被改动,则在60秒后被自动持久化保存
但是这种情况也不是很完善,比如在60秒内有10000的数据被改动,但是在58秒的时候机器断电了,不到低60秒,它也不会自动持久化储存。
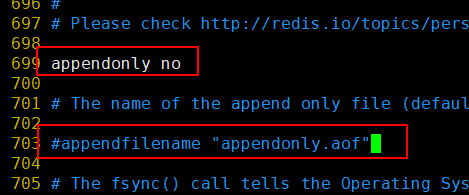
4.3、appendonly 默认情况就该配置是关闭的,需要手动开启,设置on为yes(redis.conf文件的大概700行左右),该配置开启后会自动关闭上面的save持久化方式。该方式的特点就是会保存写过的所有的命令,会把所有的命令保存到一个appendonly.aof文件中,每次启动redis都会先执行该文件,以达到持久化储存的效果。
但是这种方式也有弊端,那就是会保存很多没用的代码,后续文件会越来越大,影响redis的运行效果。
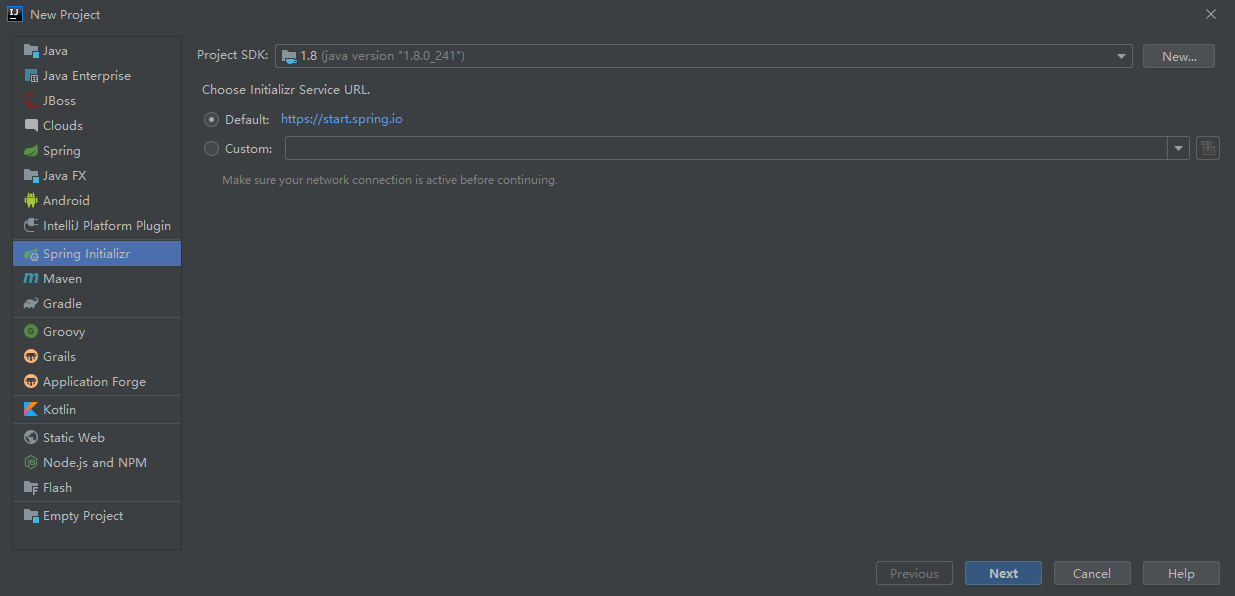
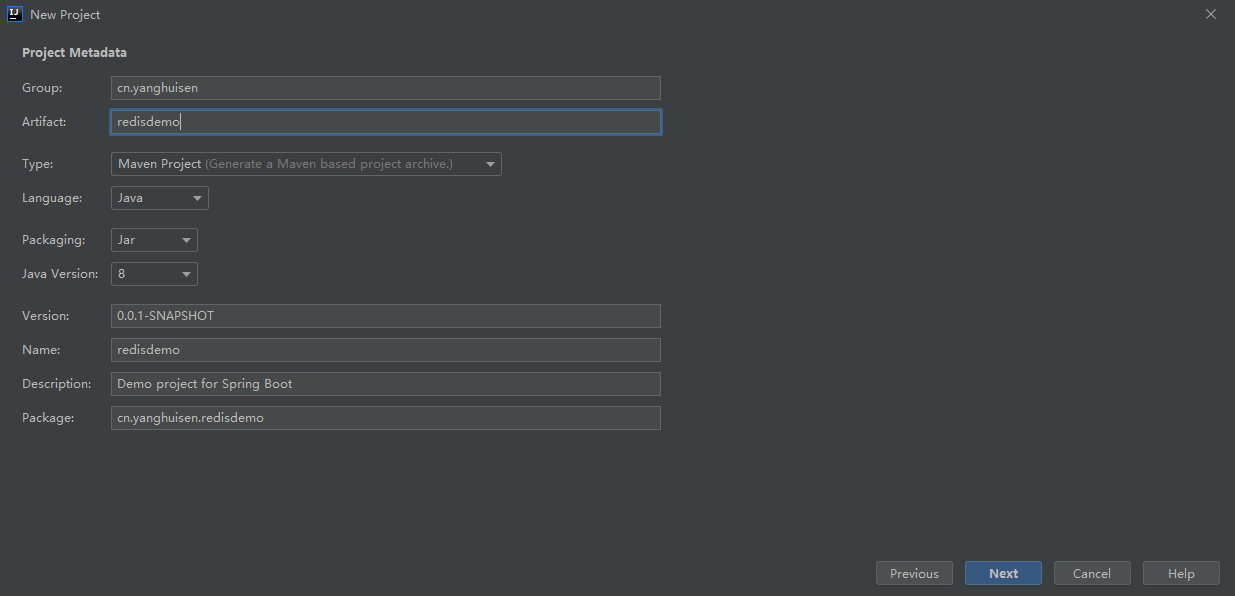
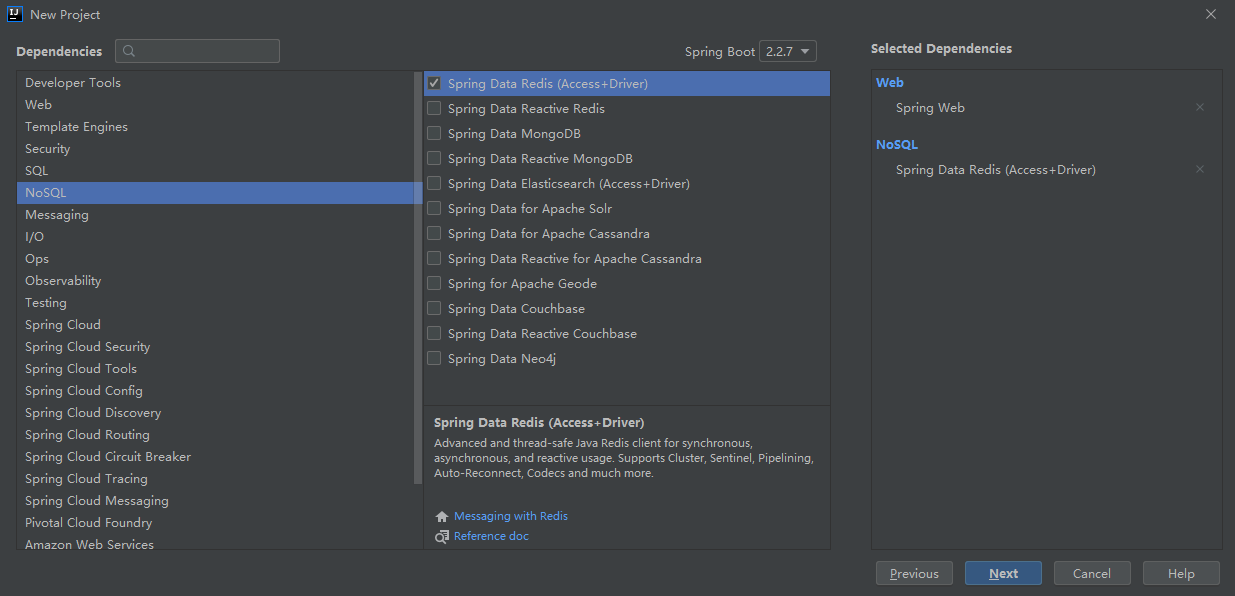
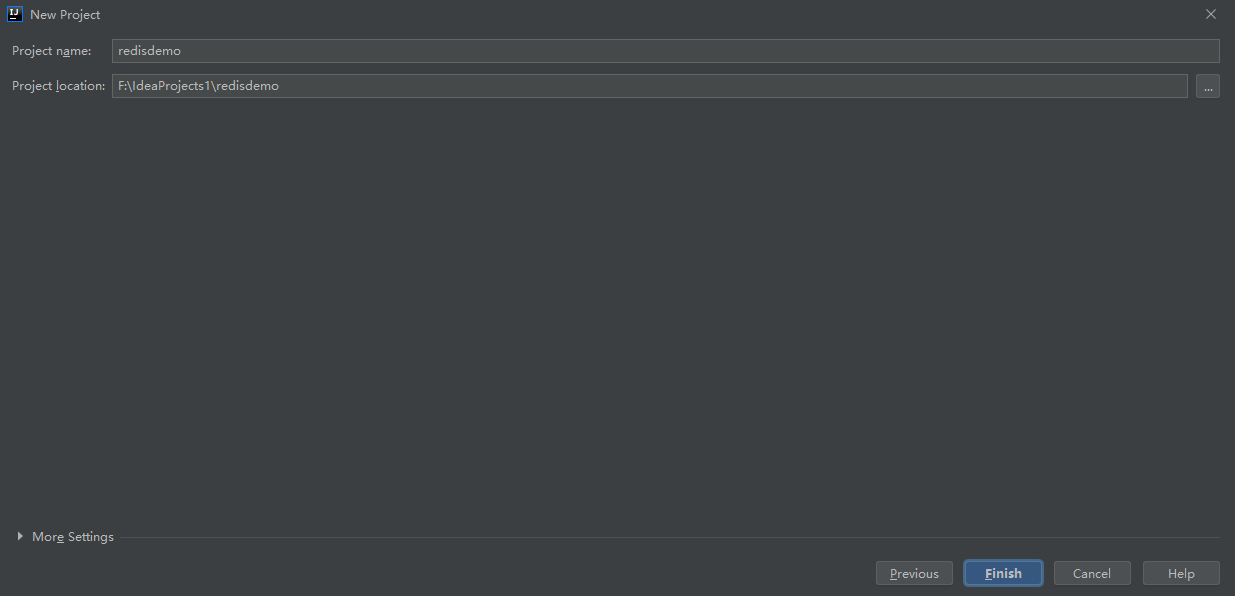
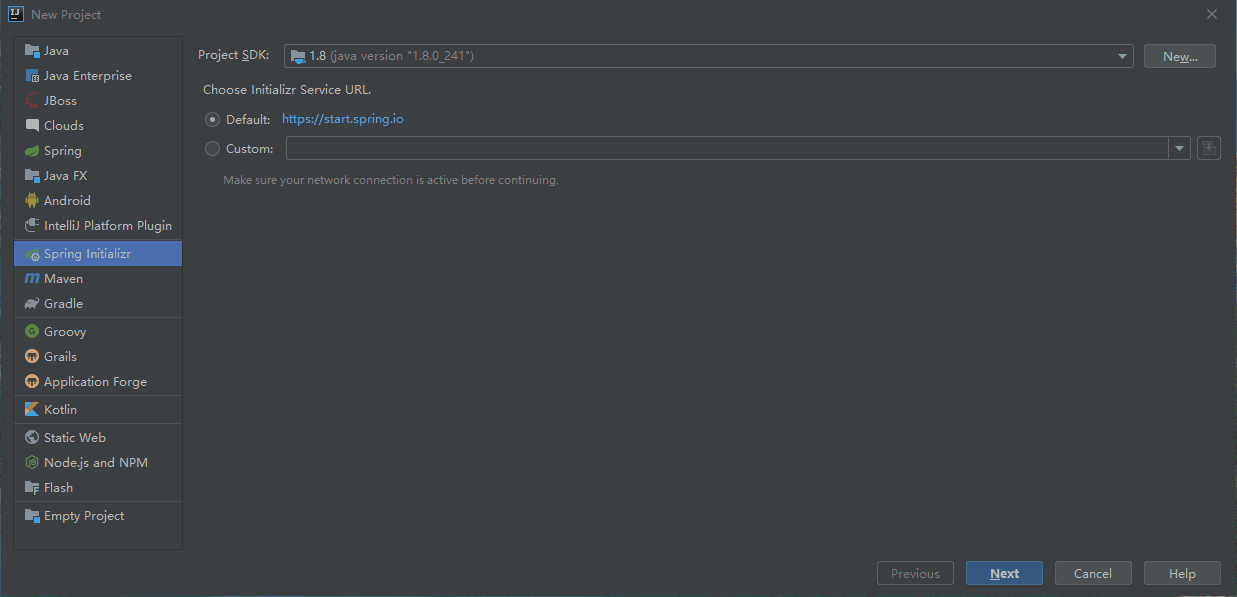
5、Java操作Redis 5.1、创建SpringBoot项目
5.2、修改POM配置文件 1、修改Test依赖
1 2 3 4 5 <dependency > <groupId > org.springframework.boot</groupId > <artifactId > spring-boot-starter-test</artifactId > <scope > test</scope > </dependency >
2、修改Redis依赖
1 2 3 4 5 6 7 8 9 10 11 12 13 14 15 16 <dependency > <groupId > org.springframework.boot</groupId > <artifactId > spring-boot-starter-data-redis</artifactId > <exclusions > <exclusion > <groupId > io.lettuce</groupId > <artifactId > lettuce-core</artifactId > </exclusion > </exclusions > </dependency >
3、添加Jedis依赖
1 2 3 4 <dependency > <groupId > redis.clients</groupId > <artifactId > jedis</artifactId > </dependency >
完整文件
1 2 3 4 5 6 7 8 9 10 11 12 13 14 15 16 17 18 19 20 21 22 23 24 25 26 27 28 29 30 31 32 33 34 35 36 37 38 39 40 41 42 43 44 45 46 47 48 49 50 51 52 53 54 55 56 57 58 59 60 61 62 63 64 65 66 67 <?xml version="1.0" encoding="UTF-8"?> <project xmlns ="http://maven.apache.org/POM/4.0.0" xmlns:xsi ="http://www.w3.org/2001/XMLSchema-instance" xsi:schemaLocation ="http://maven.apache.org/POM/4.0.0 https://maven.apache.org/xsd/maven-4.0.0.xsd" > <modelVersion > 4.0.0</modelVersion > <parent > <groupId > org.springframework.boot</groupId > <artifactId > spring-boot-starter-parent</artifactId > <version > 2.2.7.RELEASE</version > <relativePath /> </parent > <groupId > cn.yanghuisen</groupId > <artifactId > redisdemo</artifactId > <version > 0.0.1-SNAPSHOT</version > <name > redisdemo</name > <description > Demo project for Spring Boot</description > <properties > <java.version > 1.8</java.version > </properties > <dependencies > <dependency > <groupId > org.springframework.boot</groupId > <artifactId > spring-boot-starter-data-redis</artifactId > <exclusions > <exclusion > <groupId > io.lettuce</groupId > <artifactId > lettuce-core</artifactId > </exclusion > </exclusions > </dependency > <dependency > <groupId > redis.clients</groupId > <artifactId > jedis</artifactId > </dependency > <dependency > <groupId > org.springframework.boot</groupId > <artifactId > spring-boot-starter-web</artifactId > </dependency > <dependency > <groupId > org.springframework.boot</groupId > <artifactId > spring-boot-starter-test</artifactId > <scope > test</scope > </dependency > </dependencies > <build > <plugins > <plugin > <groupId > org.springframework.boot</groupId > <artifactId > spring-boot-maven-plugin</artifactId > </plugin > </plugins > </build > </project >
5.3、Jedis的的配置文件 application.yml
1 2 3 4 5 6 7 8 9 10 11 12 13 14 15 16 17 18 19 20 21 22 spring: redis: host: 192.168 .10 .100 port: 6379 password: root database: 0 timeout: 10000ms jedis: pool: max-active: 1024 max-wait: 10000ms max-idle: 200 min-idle: 5
5.4、创建连接池配置类 1 2 3 4 5 6 7 8 9 10 11 12 13 14 15 16 17 18 19 20 21 22 23 24 25 26 27 28 29 30 31 32 33 34 35 36 37 38 39 40 41 42 43 44 45 46 47 48 49 50 51 52 53 54 55 56 57 58 59 60 61 62 63 64 65 package cn.yanghuisen.redisdemo.config;import org.springframework.beans.factory.annotation.Value;import org.springframework.context.annotation.Bean;import org.springframework.context.annotation.Configuration;import redis.clients.jedis.JedisPool;import redis.clients.jedis.JedisPoolConfig;@Configuration public class JedisConfig @Value("${spring.redis.host}") private String host; @Value("${spring.redis.port}") private Integer port; @Value("${spring.redis.password}") private String password; @Value("${spring.redis.timeout}") private String timeout; @Value("${spring.redis.jedis.pool.max-active}") private Integer maxActive; @Value("${spring.redis.jedis.pool.max-wait}") private String maxWait; @Value("${spring.redis.jedis.pool.max-idle}") private Integer maxIdle; @Value("${spring.redis.jedis.pool.min-idle}") private Integer minIdle; @Bean public JedisPool redisPoolFactory () JedisPoolConfig jedisPoolConfig = new JedisPoolConfig(); jedisPoolConfig.setMaxWaitMillis(Long.parseLong(maxWait.substring(0 ,maxWait.length()-2 ))); jedisPoolConfig.setMaxTotal(maxActive); jedisPoolConfig.setMaxIdle(maxIdle); jedisPoolConfig.setMinIdle(minIdle); return new JedisPool(jedisPoolConfig,host,port,Integer.parseInt(timeout.substring(0 ,timeout.length()-2 )),password); } }
5.5、注入连接池,切入点拦截 1 2 3 4 5 6 7 8 9 10 11 12 13 14 15 @Resource private JedisPool jedisPool;private Jedis jedis = null ;@BeforeEach public void initConn () jedis = jedisPool.getResource(); } @AfterEach public void closeCinn () if (null !=jedis){ jedis.close(); } }
5.5、操作String 1 2 3 4 5 6 7 8 9 10 11 12 13 14 15 16 17 18 19 20 21 @Test void testString () jedis.set("ahh" ,"ahh" ); jedis.set("age" ,"18" ); jedis.mset("addr" ,"henan" ,"sex" ,"男" ); System.out.println(jedis.get("ahh" )); jedis.mget("age" ,"addr" ,"sex" ).forEach(System.out::println); jedis.del("sex" ); }
5.6、操作Hash 1 2 3 4 5 6 7 8 9 10 11 12 13 14 15 16 17 18 19 20 21 22 23 24 25 @Test public void testHash () jedis.hset("userInfo" ,"name" ,"ahh" ); Map<String,String> map = new HashMap<>(); map.put("age" ,"20" ); map.put("sex" ,"男" ); jedis.hmset("userInfo" ,map); System.out.println(jedis.hget("userInfo" ,"name" )); jedis.hmget("userInfo" ,"age" ,"sex" ).forEach(System.out::println); jedis.hgetAll("userInfo" ).forEach((k, v) -> { System.out.println(k+"----" +v); }); jedis.hdel("userInfo" ,"sex" ); }
5.7、操作List 1 2 3 4 5 6 7 8 9 10 11 12 13 14 15 16 17 18 19 20 21 22 @Test void testList () jedis.lpush("aabc" ,"a" ,"b" ,"c" ); jedis.rpush("aabc" ,"1" ,"2" ,"3" ); jedis.lrange("aabc" ,0 ,10 ).forEach(System.out::println); System.out.println("总条数:" +jedis.llen("aabc" )); jedis.lrem("aabc" ,1 ,"c" ); jedis.lpop("aabc" ); jedis.rpop("aabc" ); jedis.del("aabc" ); }
5.8、操作Set 1 2 3 4 5 6 7 8 9 10 11 12 13 14 @Test void testSet () jedis.sadd("letters" ,"aa" ,"bb" ,"cc" ,"dd" ); jedis.smembers("letters" ).forEach(System.out::println); System.out.println("总条数:" +jedis.scard("letters" )); jedis.srem("letters" ,"dd" ); }
5.9、操作Sorted Set 1 2 3 4 5 6 7 8 9 10 11 12 13 14 15 16 17 18 19 20 @Test void testSortedSet () Map<String,Double> map = new HashMap<>(); map.put("张三" ,5d ); map.put("李四" ,2d ); map.put("王五" ,8d ); map.put("赵六" ,6d ); jedis.zadd("students" ,map); jedis.zrange("students" ,0 ,8 ).forEach(System.out::println); System.out.println("总条数:" +jedis.zcard("students" )); jedis.zrem("students" ,"赵六" ); }
5.10、层级关系|目录形式存储数据 1 2 3 4 5 6 7 8 9 10 @Test public void testDir () jedis.set("users:user:ahh" ,"ahh" ); jedis.set("users:user:zhangsan" ,"zhangsan" ); System.out.println(jedis.get("users:user:ahh" )); System.out.println(jedis.get("users:user:zhangsan" )); }
5.11、设置失效时间 1 2 3 4 5 6 7 8 9 10 11 12 13 14 15 16 17 18 19 20 21 22 23 24 25 26 @Test public void testExpire () jedis.set("code" ,"test" ); jedis.expire("code" ,10 ); jedis.pexpire("code" ,10000L ); System.out.println(jedis.ttl("code" )); jedis.setex("code" ,10 ,"test" ); jedis.psetex("code" ,10000L ,"test" ); System.out.println(jedis.pttl("code" )); SetParams setParams = new SetParams(); setParams.xx(); setParams.px(10000L ); jedis.set("code" ,"test" ,setParams); }
5.12、获取所有的key 1 2 3 4 5 6 7 8 9 10 @Test void testKeyAll () System.out.println(jedis.dbSize()); jedis.keys("*" ).forEach(System.out::println); }
5.13、删除 1 2 3 4 5 6 7 @Test void testDel () jedis.del("userInfo" ); }
5.14、事务 1 2 3 4 5 6 7 8 9 10 11 12 13 @Test void testMulti () Transaction tx = jedis.multi(); tx.set("tel" ,"1010" ); tx.exec(); }
5.15、byte序列化 序列化和反序列化工具
1 2 3 4 5 6 7 8 9 10 11 12 13 14 15 16 17 18 19 20 21 22 23 24 25 26 27 28 29 30 31 32 33 34 35 36 37 38 39 40 41 42 43 44 45 46 47 48 package cn.yanghuisen.redisdemo.utils;import java.io.*;public class SerializeUtil public static byte [] serialize(Object obj){ ObjectOutputStream oos = null ; ByteArrayOutputStream baos = null ; try { baos = new ByteArrayOutputStream(); oos = new ObjectOutputStream(baos); oos.writeObject(obj); return baos.toByteArray(); } catch (IOException e) { e.printStackTrace(); } return null ; } public static Object unserialize (byte [] bytes) if (null ==bytes){ return null ; } ByteArrayInputStream bais = null ; try { bais = new ByteArrayInputStream(bytes); ObjectInputStream ois = new ObjectInputStream(bais); return ois.readObject(); } catch (Exception e) { e.printStackTrace(); } return null ; } }
用户类
1 2 3 4 5 6 7 8 9 10 11 12 13 14 15 16 17 18 19 20 21 22 23 24 25 26 27 28 29 30 31 32 33 34 35 36 37 38 39 package cn.yanghuisen.redisdemo.pojo;import java.io.Serializable;public class User implements Serializable private Integer id; private String name; public Integer getId () return id; } public void setId (Integer id) this .id = id; } public String getName () return name; } public void setName (String name) this .name = name; } @Override public String toString () return "User{" + "id=" + id + ", name='" + name + '\'' + '}' ; } }
数据储存和获取
1 2 3 4 5 6 7 8 9 10 11 12 13 14 15 16 17 18 19 20 @Test void testByte () User user = new User(); user.setId(1 ); user.setName("ahh" ); byte [] userkey = SerializeUtil.serialize("user:" +user.getId()); byte [] uservalue = SerializeUtil.serialize(user); jedis.set(userkey,uservalue); byte [] values = jedis.get(userkey); System.out.println(SerializeUtil.unserialize(values)); }
6、Redis搭建主从复用 单机版的Redis可能会出现一个问题就是,一旦服务器宕机就无法使用,所以Redis有一个主从复用的概念,就是说有一个主服务器和从服务器,主服务器提供写入和读取,从服务器提供取的功能,一旦其中一个从服务器出现了问题,还有其它的从服务区提供使用,一旦主服务器出现了问题,可以把其中的一个从服务器变为主服务器。
6.1、读写分离 把Redis分为主从关系,一个主服务器,和两个从服务器。
主服务器提供写入和获取,从服务器只提供获取功能。
1、创建三个目录
data:数据文件
log:日志文件
conf:配置文件
2、复制redis.conf配置文件到创建的配置文件目录下
3、配置配置文件,作为公共配置文件
注释掉bind,运行外界连接
关闭保护模式,否则外界无法连接
注释公共配置端口,后期需要运行三个redis,每个的端口不一样,需要针对每个redis进行私有的配置
修改为后台启动
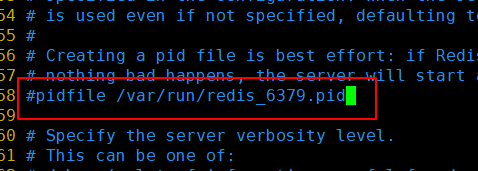
注释进程编号,三个redis的进程编号都是不一样的,需要针对的进行私有配置
注释公共配置日志文件,三个redis有三个日志文件,私有配置
注释公共配置数据文件,修改数据文件路径为创建的数据文件路径
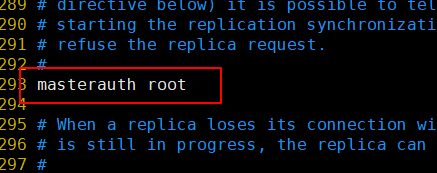
添加从数据库访问主服务器认证密码
设置访问认证,三个redis的认证密码都是一个,设置为公用的
注释公共配置追加文件,这个根据需求选择是否使用,这里关闭
设置从服务器只能读取,不能写入
保存退出
6.2、创建配置三个私有配置文件 1、创建三个配置文件
redis-xxxx :xxxx表示的每个的端口,为了方便区分
2、修改每个的配置文件
redis-6379.conf
1 2 3 4 5 6 7 8 9 10 11 12 # 引用公共配置文件 include /opt/redis/conf/redis-common.conf # 进程编号记录文件 pidfile /var/run/redis-6379.pid # 进程端口号 port 6379 # 日志记录文件 logfile "/opt/redis/log/redis-6379.log" # 数据记录文件 dbfilename dump-6379.rdb # 追加文件名称 appendfilename "appendonly-6379.aof"
redis-6380.conf
1 2 3 4 5 6 7 8 9 10 11 12 13 14 # 引用公共配置文件 include /opt/redis/conf/redis-common.conf # 进程编号记录文件 pidfile /var/run/redis-6380.pid # 进程端口号 port 6380 # 日志记录文件 logfile "/opt/redis/log/redis-6380.log" # 数据记录文件 dbfilename dump-6380.rdb # 追加文件名称 appendfilename "appendonly-6380.aof" # 设置主服务器的IP地址 slaveof 192.168.10.100 6379
redis-6381.conf
1 2 3 4 5 6 7 8 9 10 11 12 13 14 # 引用公共配置文件 include /opt/redis/conf/redis-common.conf # 进程编号记录文件 pidfile /var/run/redis-6381.pid # 进程端口号 port 6381 # 日志记录文件 logfile "/opt/redis/log/redis-6381.log" # 数据记录文件 dbfilename dump-6381.rdb # 追加文件名称 appendfilename "appendonly-6381.aof" # 设置主服务器的IP地址 slaveof 192.168.10.100 6379
6.3、运行三个redis进程,并测试主从 1、运行三个redis进程
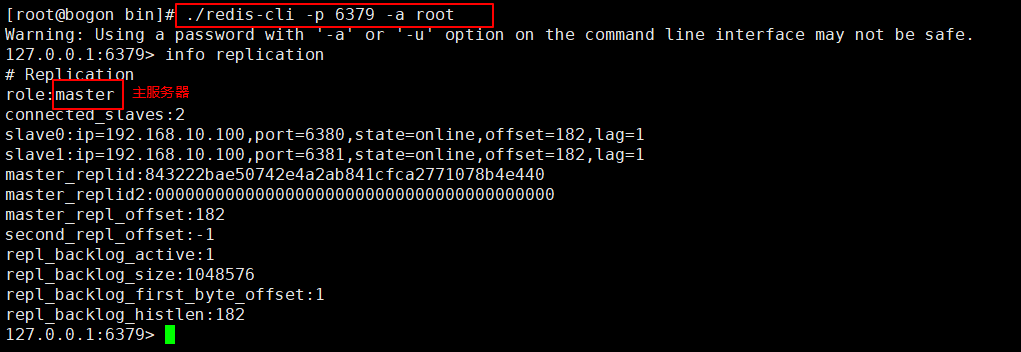
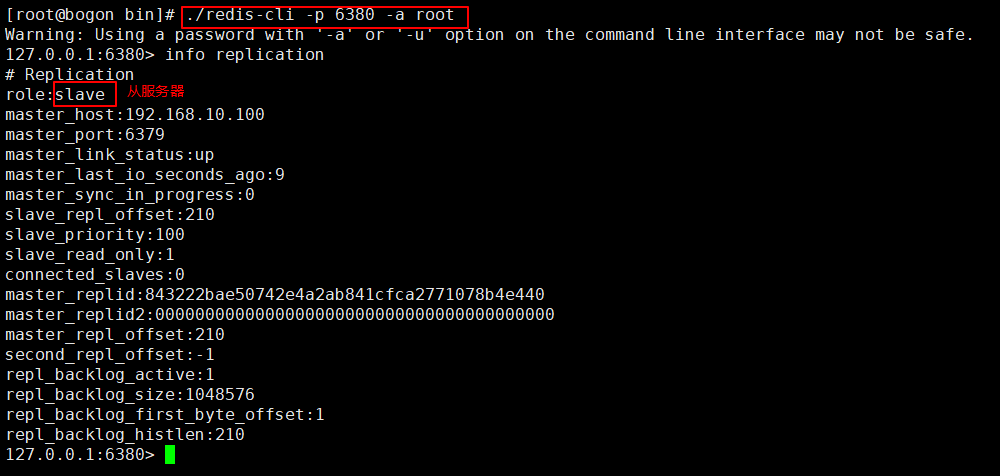
2、查看每个服务器的主从状态
主服务器
从服务器1
从服务器2
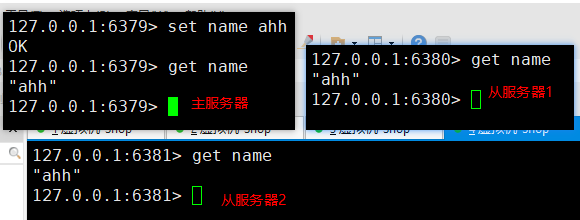
3、测试主服务下添加数据,在从服务器下查询是否正常
4、从服务器不能写入测试
6.4、主备切换 上面已经进行了读写分离,完成了主从服务器,但是这时还有一个问题,如果主服务器出现了问题,那么就不能再进行写入操作,只能使用从服务器获取主服务宕机之前的数据,为了解决这一问题,就引入了一个叫做哨兵的方案,通过哨兵,可以检测到主服务是否宕机,如果主服务器宕机了,就会在满足一定的要求后选举一个从服务器变为主服务,如果之前宕机的主服务恢复了,则被宕机的服务变为从服务。以此来解决,主服务宕机后,无法在提供写入操作的问题。
6.4.1、复制哨兵配置文件到创建的配置文件目录下 1 cp /root/redis-5.0.3/sentinel.conf /opt/redis/conf/
6.4.2、修改哨兵配置文件 注释哨兵监听进程端口号
指示哨兵监听一个主服务器,主服务器地址为192.168.10.100,端口为6379,2表示判断失败的要求,配置三个哨兵,一半(3个的一半为1.5,取整为2)以上都监听主服务状态为不达标就更换主服务器
设置密码
设置哨兵认为服务器断线所需的毫秒数。
默认是30000毫秒,也就是30秒,为了测试改为10000毫秒
设置主服务和从服务器切换时间
默认是3分钟,如果三分钟内没有切换成功,则本次切换失败
关闭哨兵的保护模式
修改哨兵为后台启动
6.4.3、添加三个私有哨兵配置文件
私有哨兵配置1
1 2 3 4 5 6 7 8 # 引用公共配置 include /opt/redis/conf/sentinel.conf # 进程端口号 port 26379 # 进程编号近路文件 pidfile /var/run/sentinel-26379.pid # 日志文件 logfile "/opt/redis/log/sentinel-26379.log"
私有哨兵配置2
1 2 3 4 5 6 7 8 # 引用公共配置 include /opt/redis/conf/sentinel.conf # 进程端口号 port 26380 # 进程编号近路文件 pidfile /var/run/sentinel-26380.pid # 日志文件 logfile "/opt/redis/log/sentinel-26380.log"
私有哨兵配置2
1 2 3 4 5 6 7 8 # 引用公共配置 include /opt/redis/conf/sentinel.conf # 进程端口号 port 26381 # 进程编号近路文件 pidfile /var/run/sentinel-26381.pid # 日志文件 logfile "/opt/redis/log/sentinel-26381.log
6.4.4、哨兵启动测试 1、启动三个哨兵
2、查看主服务器和从服务状态
[外链图片转存失败,源站可能有防盗链机制,建议将图片保存下来直接上传(img-RG5Gs2Gg-1589464617789)(http://images.yanghuisen.cn/FitC_MDwSArK5ra8zhbOFGQStflB)]
3、杀死主服务器,模拟主服务宕机
杀死主服务器后等待10秒,让哨兵选择新的主服务器,并重新启动被杀死的服务器
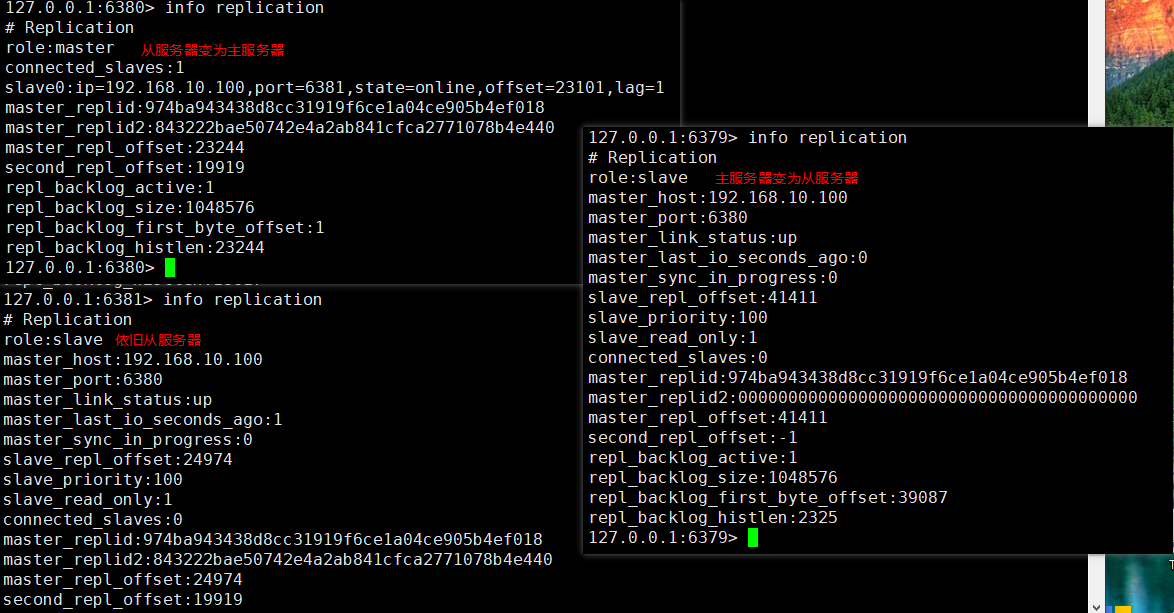
4、查看哨兵选重新选举后的服务器状态
7、SpringDataRedis SpringBoot1.X版本默认使用的是jedis作为Redsi的Java客户端,而2.X版本使用的是lettuce作为Redis的Java客户端。
两者的区别为:
Jedis:在实现上直接连接的Redis-Server,在多个线程间共享一个Jedis实例。线程不安全。如果要在多线程的场景下使用Jedis,需要使用连接池,每个线程都使用自己的Jedis实例,当连接数量增多时,会小号大量的物理资源。
lettuce:基于Netty的连接,是一个可伸缩的线程安全的Redis客户端,支持同步、一步和响应式模式。多个线程可以共享一个连接实例,而不必安全多线程并发的问题。它基于NettyNIO框架构建,支持redis的高级功能,如Sentinel(哨兵)、集群、流水线、自动连接和Redis数据模型。
7.1、创建SpringBoot项目
7.2、添加依赖 1 2 3 4 5 6 7 8 9 10 11 12 13 14 15 16 17 18 19 20 21 22 23 24 25 26 27 28 29 30 31 32 <dependencies > <dependency > <groupId > org.springframework.boot</groupId > <artifactId > spring-boot-starter-data-redis</artifactId > </dependency > <dependency > <groupId > org.apache.commons</groupId > <artifactId > commons-pool2</artifactId > </dependency > <dependency > <groupId > org.springframework.boot</groupId > <artifactId > spring-boot-starter-web</artifactId > </dependency > <dependency > <groupId > org.springframework.boot</groupId > <artifactId > spring-boot-starter-test</artifactId > <scope > test</scope > <exclusions > <exclusion > <groupId > org.junit.vintage</groupId > <artifactId > junit-vintage-engine</artifactId > </exclusion > </exclusions > </dependency > </dependencies >
7.3、添加application.yml配置文件 1 2 3 4 5 6 7 8 9 10 11 12 13 14 15 16 17 18 19 20 21 22 spring: redis: host: 192.168 .10 .100 port: 6379 password: root database: 0 timeout: 10000ms lettuce: pool: max-active: 1024 max-wait: 10000ms max-idle: 200 min-idle: 5
7.4、测试环境是否搭建成功 1 2 3 4 5 6 7 8 9 10 11 12 13 14 15 16 17 @SpringBootTest class SpringDataRedisDemoApplicationTests @Resource private RedisTemplate redisTemplate; @Resource private StringRedisTemplate stringRedisTemplate; @Test void initConn () ValueOperations<String,String> ops = stringRedisTemplate.opsForValue(); ops.set("userName" ,"ahh" ); ValueOperations<String,String> value = redisTemplate.opsForValue(); value.set("name" ,"zhangsan" ); System.out.println(ops.get("name" )); } }
7.5、序列化问题 上面的测试程序,虽然成功的把数据写入了,但是写入的是一个二进制字节码,需要处理一下。
RedisTemplate使用的是JdkSerializationRedisSerializer进行序列化,会序列化为二进制字节码储存。这时需要自定义模板解决。当自定义模板后,又想储存String字符串可以使用StringRedisTemplate。自定义的模板和StringRedisTemplate不冲突。
序列化的选择:
JdkSerializationRedisSerializer:该序列化为RedisTemplate的默认序列化工具,是JDK提供的,有点是反序列化时不需要提供类型信息(class),但是缺点就是序列化后的结果非常大,而且看不懂,时json格式的5倍左右,会消耗redis服务器的大量内存。Jackson2JsonRedisSerializer:使用的时Jackson库将对象序列化为json字符串,优点是速度快,序列化后的字符串短小精悍,但是缺点也非常致命,那就是此类的构造函数中有一个类型参数,必须提供要序列化对象的类型信息,通过查看源代码,发现其只再反序列化过程中用到了类型信息。GenericJackson2JsonRedisSerializer:通用型序列化,这种序列化方式不用自己手动指定对象的Class。
自定义模板
1 2 3 4 5 6 7 8 9 10 11 12 13 14 15 16 17 18 19 20 21 22 23 24 25 26 27 28 29 30 31 32 33 34 35 package cn.yanghuisen.springdataredisdemo.config;import org.springframework.context.annotation.Bean;import org.springframework.context.annotation.Configuration;import org.springframework.data.redis.connection.lettuce.LettuceConnectionFactory;import org.springframework.data.redis.core.RedisTemplate;import org.springframework.data.redis.serializer.GenericJackson2JsonRedisSerializer;import org.springframework.data.redis.serializer.StringRedisSerializer;@Configuration public class RedisConfig @Bean public RedisTemplate<String,Object> redisTemplate (LettuceConnectionFactory lettuceConnectionFactory) RedisTemplate<String,Object> redisTemplate = new RedisTemplate<>(); redisTemplate.setKeySerializer(new StringRedisSerializer()); redisTemplate.setValueSerializer(new GenericJackson2JsonRedisSerializer()); redisTemplate.setHashKeySerializer(new StringRedisSerializer()); redisTemplate.setHashValueSerializer(new GenericJackson2JsonRedisSerializer()); redisTemplate.setConnectionFactory(lettuceConnectionFactory); return redisTemplate; } }
序列化测试
1 2 3 4 5 6 7 8 9 @Test void testSerial () User user = new User(); user.setId(1 ); user.setName("ahh" ); ValueOperations ops = redisTemplate.opsForValue(); ops.set("user" ,user); System.out.println(ops.get("user" )); }
Ok
7.6、操作String 1 2 3 4 5 6 7 8 9 10 11 12 13 14 15 16 17 18 19 @Test void testString () ValueOperations vos = redisTemplate.opsForValue(); vos.set("userName" ,"zhangsan" ); vos.set("user:01" ,"ahh" ); Map<String,String> userMap = new HashMap<>(); userMap.put("age" ,"18" ); userMap.put("sex" ,"男" ); vos.multiSet(userMap); System.out.println(vos.get("userName" )); List<String> keys = Arrays.asList("userName" ,"age" ,"sex" ); vos.multiGet(keys).forEach(System.out::println); }
7.7、操作Hash 1 2 3 4 5 6 7 8 9 10 11 12 13 14 15 16 17 18 19 20 21 22 @Test void testHash () HashOperations<String,String,String> hos = redisTemplate.opsForHash(); hos.put("userInfo" ,"name" ,"zhangsan" ); Map<String,String> map = new HashMap<>(); map.put("age" ,"20" ); map.put("sex" ,"男" ); hos.putAll("userInfo" ,map); System.out.println(hos.get("userInfo" ,"name" )); List<String> keys = Arrays.asList("age" ,"sex" ); hos.multiGet("userInfo" ,keys).forEach(System.out::println); hos.entries("userInfo" ).forEach((k,v)->{ System.out.println(k+"---" +v); }); hos.delete("userInfo" ,"name" ); }
7.8、操作List 1 2 3 4 5 6 7 8 9 10 11 12 13 14 15 16 17 18 19 @Test void testList () ListOperations los = redisTemplate.opsForList(); los.leftPush("students" ,"张三" ); los.leftPush("students" ,"李四" ); los.leftPush("students" ,"李四" ,"王五" ); los.rightPush("students" ,"赵六" ); los.range("students" ,1 ,10 ).forEach(System.out::println); System.out.println(los.index("students" ,1 )); System.out.println(los.size("students" )); los.remove("students" ,1 ,"张三" ); }
7.9、操作oSet 1 2 3 4 5 6 7 8 @Test void testSer () SetOperations sos = redisTemplate.opsForSet(); sos.add("letters" ,new String[]{"aaa" ,"bbb" ,"ccc" ,"ddd" }); sos.members("letters" ).forEach(System.out::println); sos.remove("letters" ,"aaa" ,"bbb" ); }
7.10、操作SortedSet 1 2 3 4 5 6 7 8 9 10 11 12 13 14 15 @Test void testSoredSet () ZSetOperations zsos = redisTemplate.opsForZSet(); zsos.add("score" ,"zhangsan" ,5D ); zsos.add("score" ,"lisi" ,2D ); zsos.add("score" ,"wangwu" ,9D ); zsos.add("score" ,"zhaoliu" ,3D ); zsos.range("score" ,0 ,5 ).forEach(System.out::println); System.out.println(zsos.size("score" )); zsos.remove("score" ,"wangwu" ,"zhangsan" ); }
7.11、获取所有的Key 1 2 3 4 @Test void testAllKeys () redisTemplate.keys("*" ).forEach(System.out::println); }
7.12、删除 1 2 3 4 5 @Test void testDelete () redisTemplate.delete("score" ); }
7.13、设置Key的失效时间 1 2 3 4 5 6 7 8 9 10 @Test void testEx () ValueOperations vos = redisTemplate.opsForValue(); vos.set("code" ,"abcd" ,180 , TimeUnit.SECONDS); redisTemplate.expire("code" ,180 ,TimeUnit.SECONDS); System.out.println(redisTemplate.getExpire("code" )); }
7.14、整合使用哨兵机制 配置文件
1 2 3 4 5 6 7 8 9 10 11 12 13 14 15 16 17 18 19 20 21 22 23 24 25 26 27 28 spring: redis: host: 192.168 .10 .100 port: 6380 password: root database: 0 timeout: 10000ms lettuce: pool: max-active: 1024 max-wait: 10000ms max-idle: 200 min-idle: 5 sentinel: master: mymaster nodes: 192.168 .10 .100 :26379,192.168.10.100:26380,192.168.10.100:26381
配置类
1 2 3 4 5 6 7 8 9 10 11 12 13 @Bean RedisSentinelConfiguration redisSentinelConfiguration () { RedisSentinelConfiguration sentinelConfiguration = new RedisSentinelConfiguration(). master("mymaster" ) .sentinel("192.168.10.100" ,26379 ) .sentinel("192.168.10.100" ,26380 ) .sentinel("192.168.10.100" ,26381 ); sentinelConfiguration.setPassword("root" ); return sentinelConfiguration; }


